Create a new Deck
Go to an empty page. Open the plugin. Choose a name for the deck, select a size and orientation, and
click "Create Deck."
The plugin will set the name of the page and create frames for the front and back of the card.
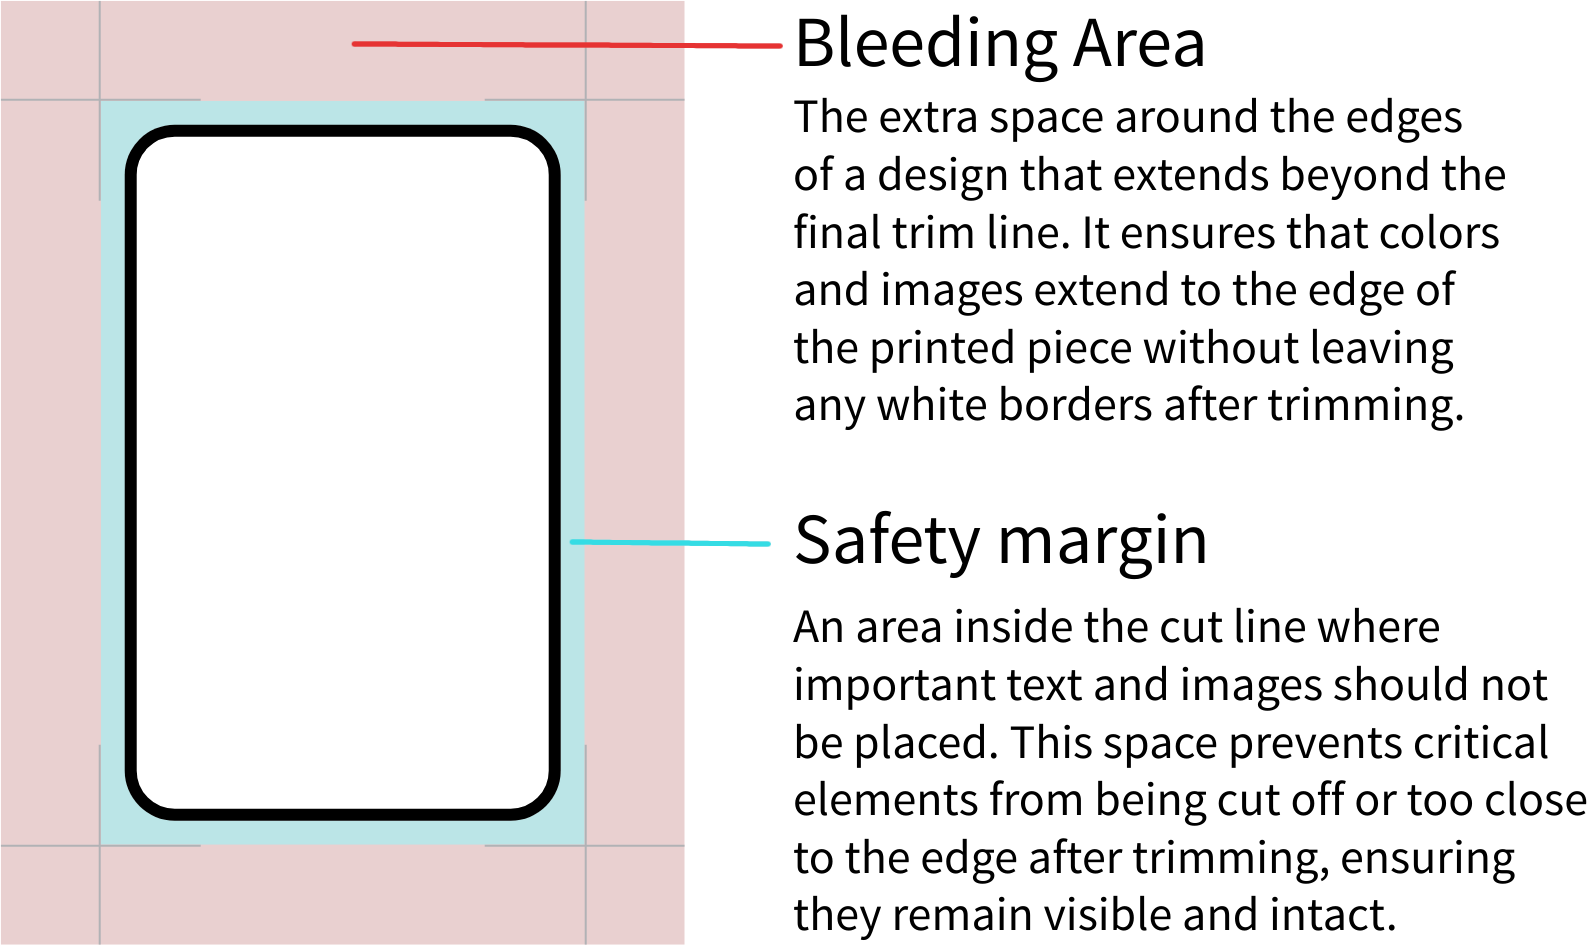
These frames have a bleed area (see further on) and a border. Feel free to modify them according to
your needs.
Design a base card
Design a card within the Front frame as you wish, but do not change the size or the name of the frame.
Add image and text layers for the sections of the card that will differ on each card. These variable
layers must have a unique name and start with the character #. For example, #name, #background, #image,
#power...
Design the back of the cards within the Back frame, but do not change the size or the name of the frame
either. The back cannot have variable fields.
Cards list
Here you will find a list of all the cards in your deck. Click "Add Card" to create a new card.
For each card, you can assign values to the text or image variable fields.
You can also duplicate or delete a card.
When all the cards are ready, press "Forge Cards" to create them.
Forging cards (1/2)
You can create your cards in three different ways
Standard: This method is for printing at a print shop. They typically require a separate file for
each card, so this option generates a list of all the cards to export each one individually.
Print and Play: This method is for printing the cards on a regular printer. It will arrange your
cards on A4 pages, which you can export and print individually. It also set the front and
back of each card together, so you can fold them along the joint to assemble the physical cards.
Forging cards (2/2)
Tabletop: This method creates a single frame containing all the cards arranged in a 10x7 grid,
with the back positioned in the bottom right corner. This format is used by Tabletop
Simulator and similar software.
For both Standard and Print and Play, you can also choose to include cut marks to assist you (or the
print shop) in cutting the cards.